Enjoy the journey.

Category: Recipes

Luxury on a Budget: Afternoon Tea

IMG_3162

I’ve said it before and I still mean it: When you’re trying to save money, luxuries have to come first. It’s not just possible to enjoy a little luxury while sticking to your budget; it’s absolutely essential. If life has no space for a bit of pleasure now and then, what on earth are you budgeting for?

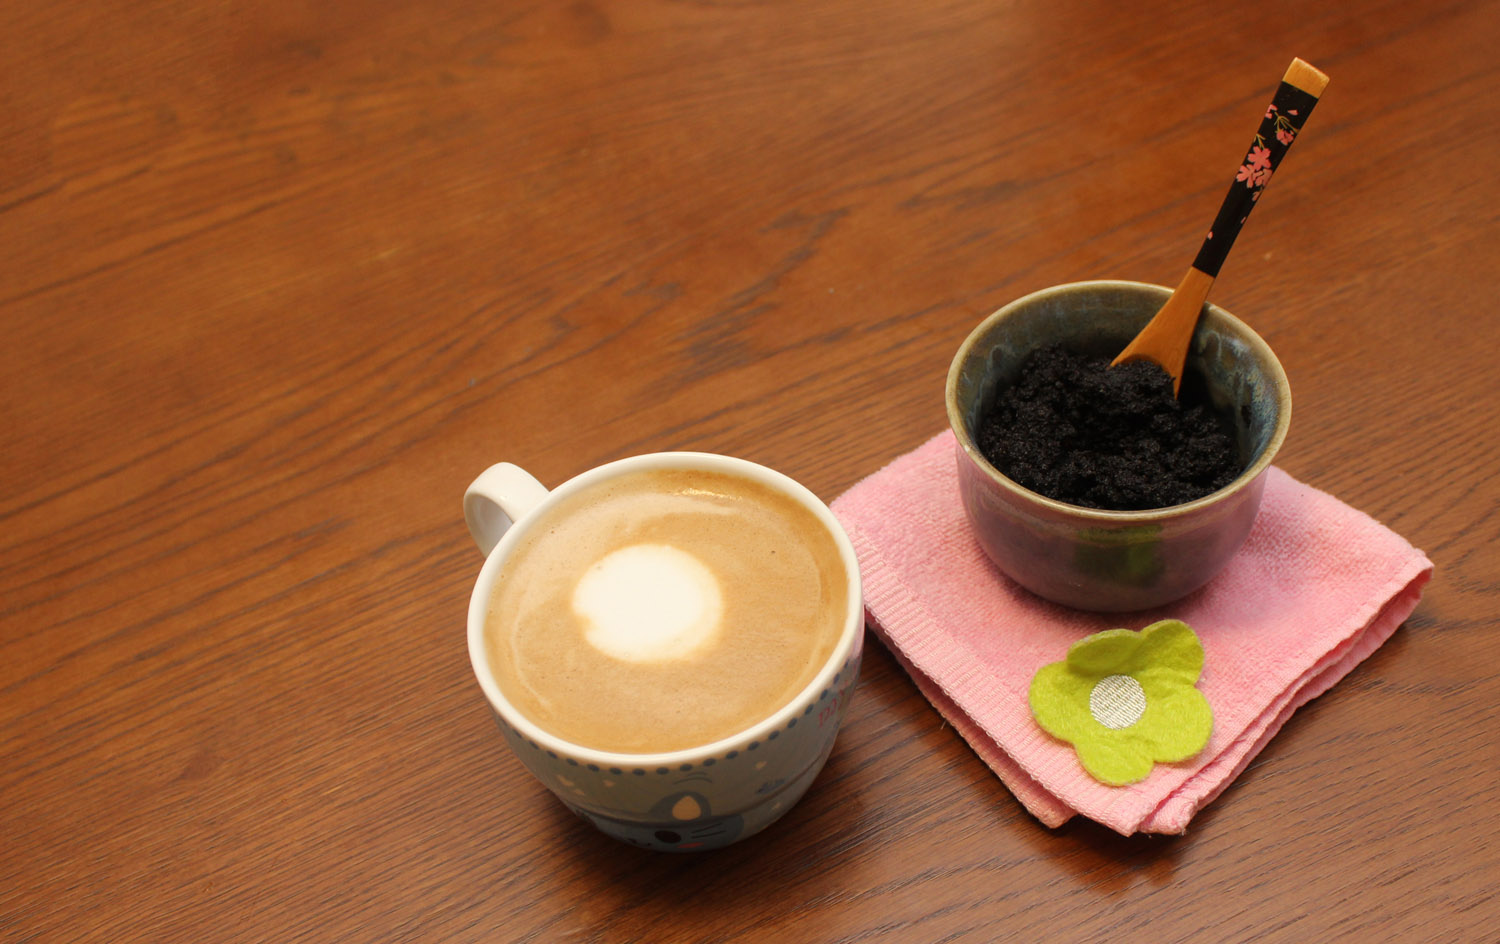
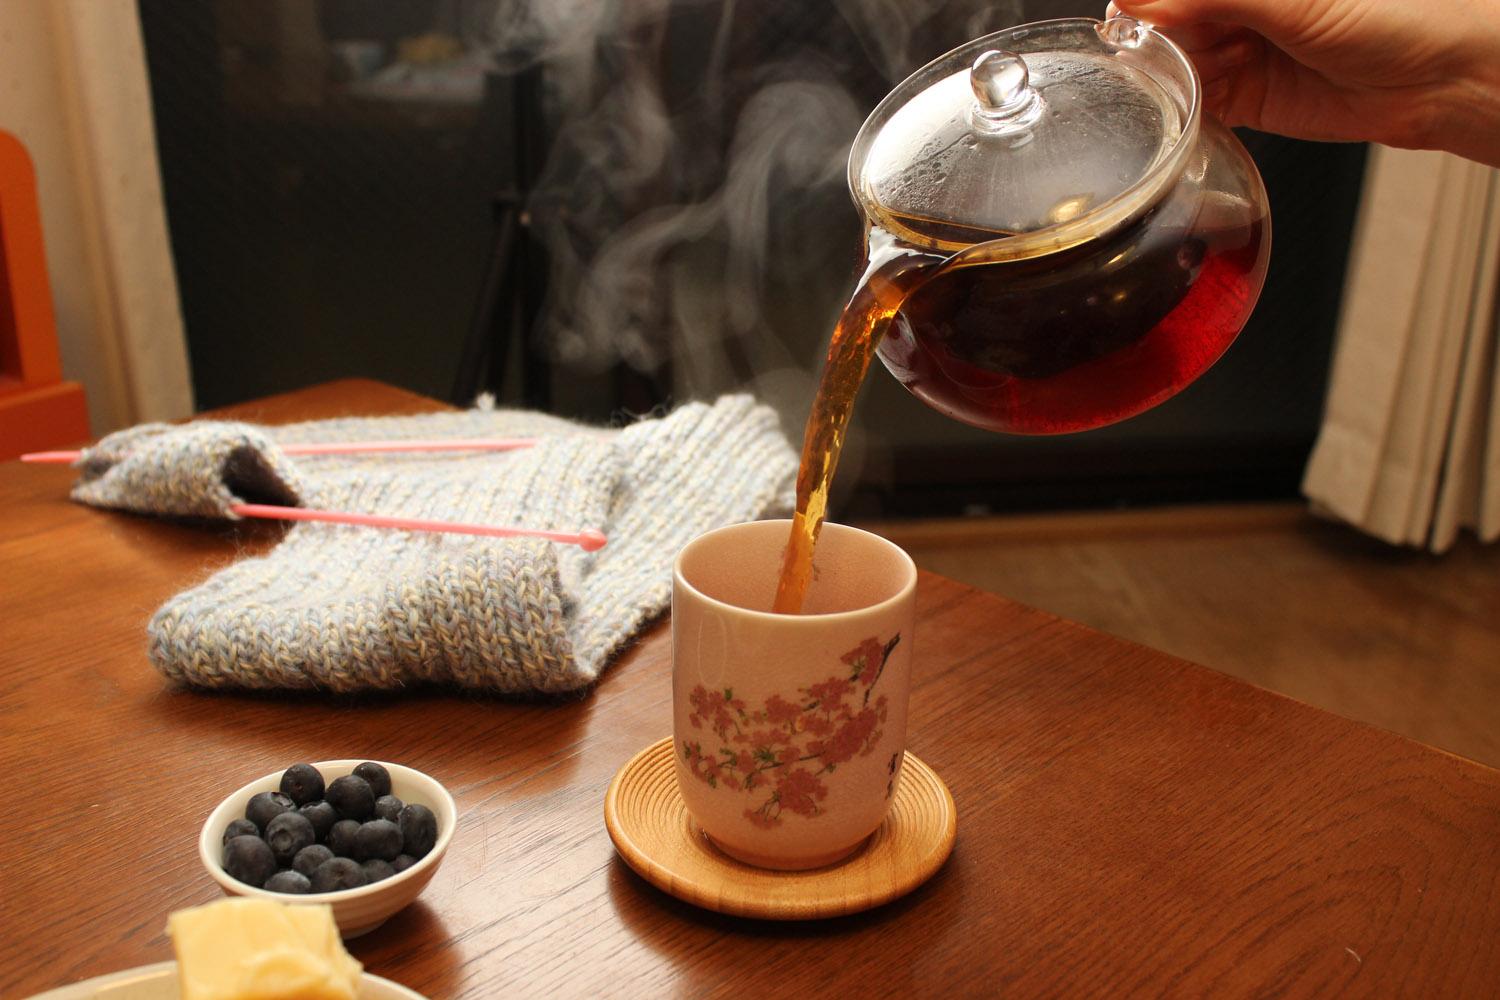
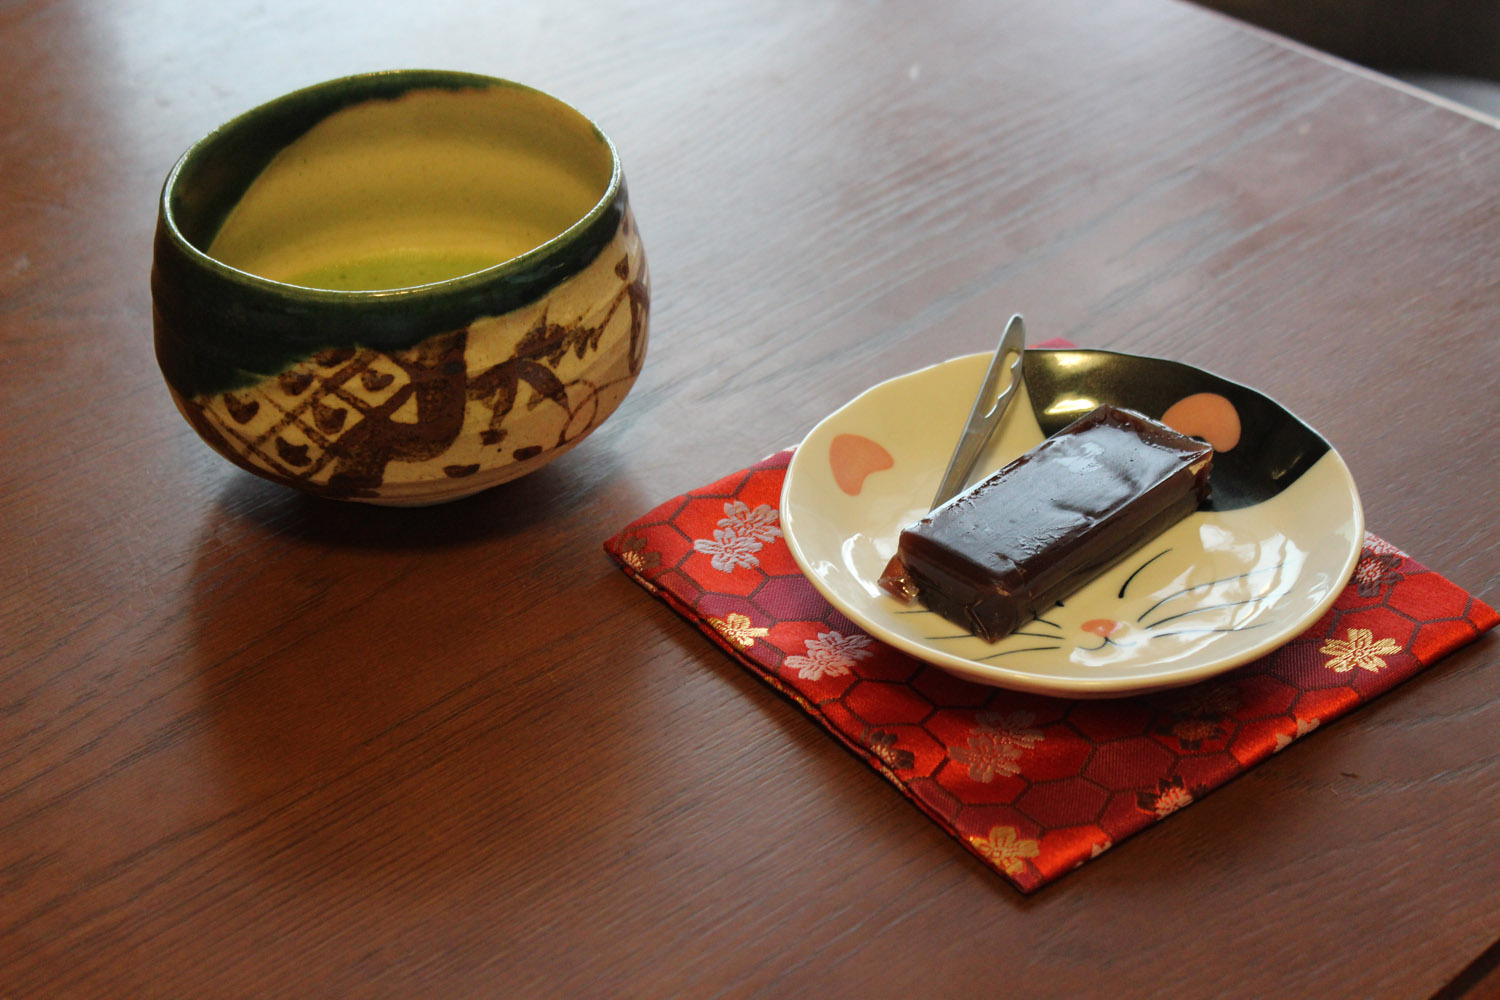
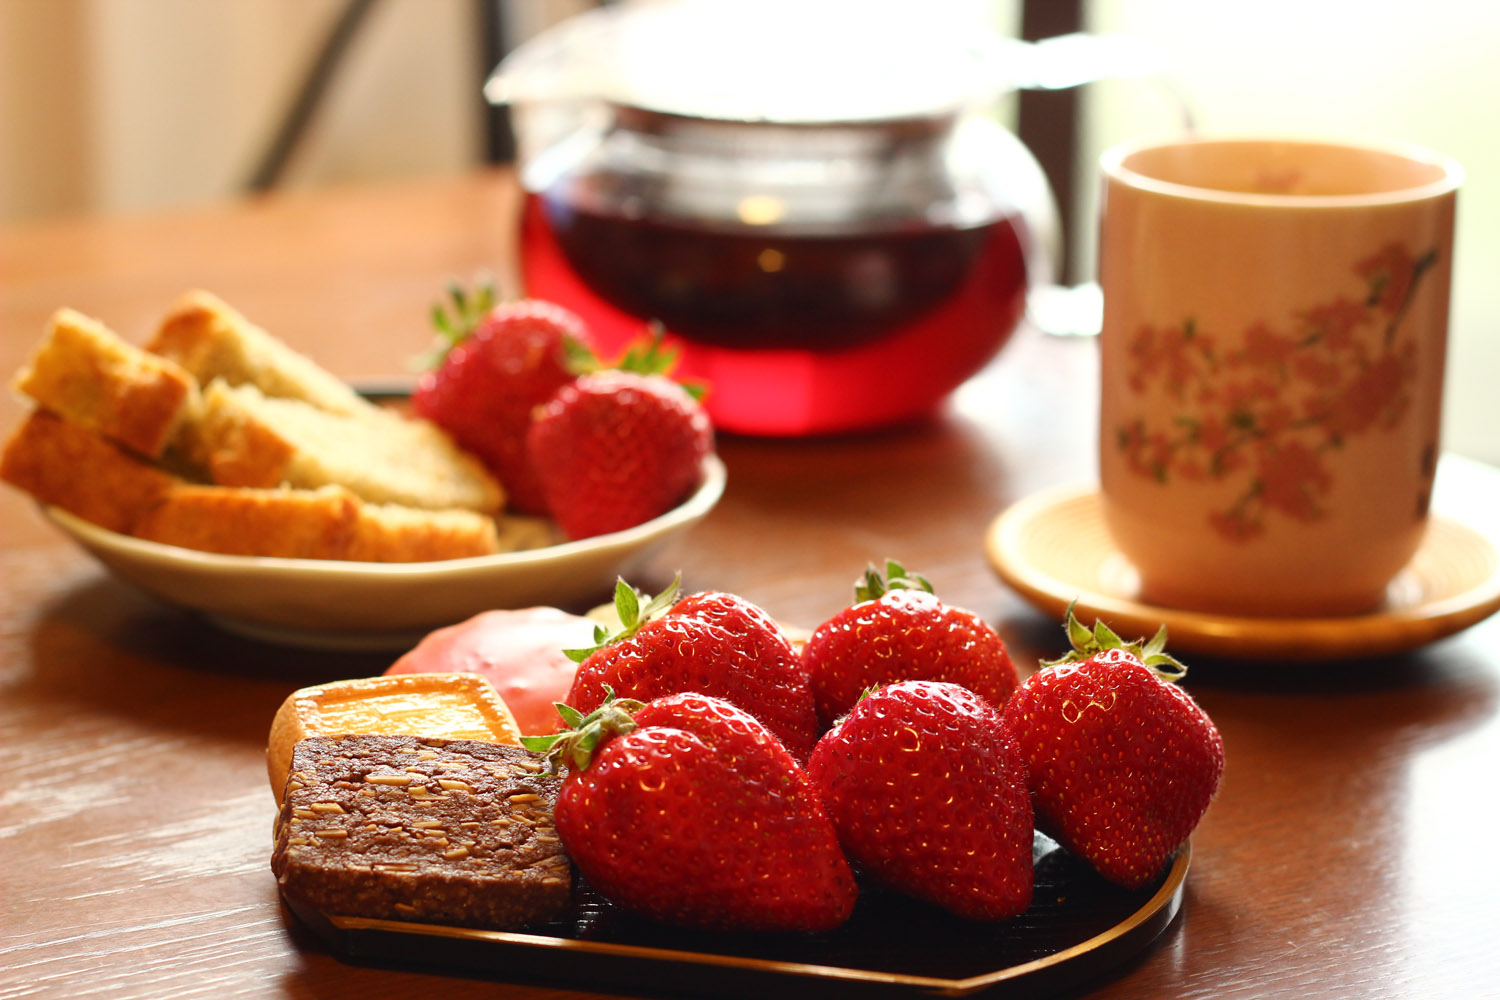
There’s good news for your bank account, though. When it comes to enjoying a luxury, the thing itself is only part of the package. The main point is the quality of the experience. And the good thing about that is that it means you can have a whole lot of indulgence without spending very much. One happy little low-cost luxury enjoyed in Australian homes, schools and workplaces is morning and afternoon tea.

Japan understood the importance of teatime very well, changing the brew from hot matcha or oolong in winter to cold green or barley tea in summer, enjoyed with a variety of sweet or salted snacks. China and Hong Kong enjoy formal and informal teatimes, including yum cha, the ultimate tea break. South Americans sip volcanic mate, while India and the U.K. both enjoy their morning and afternoon tiffin with savouries and sweets (hence the Australian and New Zealander taste for the experience). Whenever you enjoy it and whatever you call it, when it comes to luxury on a budget, teatime is right up there with foot massages for pleasure and value for money.

IMG_8316

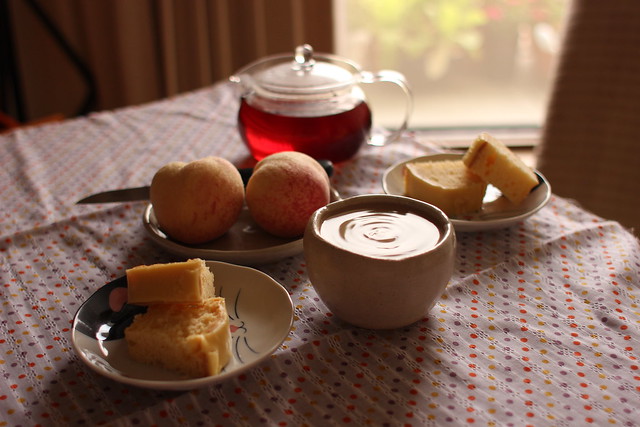
Being Australian, Kin and I have always enjoyed our morning and afternoon teas, but we only started making an event of it during our first Japanese winter. Maybe being indoors so much caused us to try and make it a richer experience or maybe the frozen landscape so far from home caused us to invoke the spirits of our ancestors with their tin teapots, fruitcake, scones and blessed, blessed heat. Whatever our reason for starting, we kept it going all through that winter and now, two years later, we still haven’t stopped. No matter how busy or wretched the day, we always come together in the afternoon to enjoy a little oasis of peace and pleasant sensations.

IMG_1567

Remember that word, please! PEACE is the point to your afternoon tea. This is an everyday event, so it’s not supposed to cause you any stress or problems. With peace in mind, here are a couple of my simplest, most reliable recipes for teatime treats:

(All measures are Australian and metric. I’ll include a conversion chart on the site soon, but for now, look them up here.)
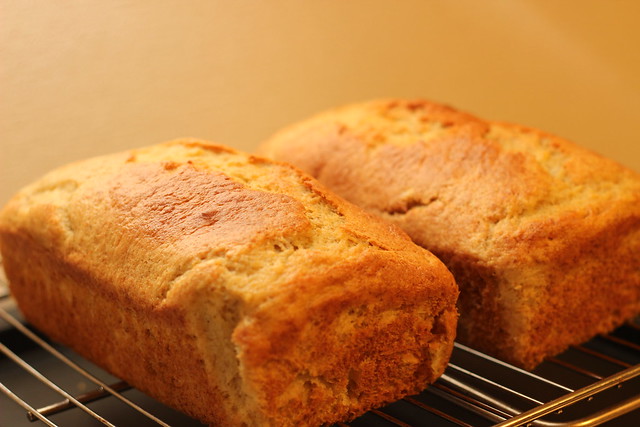
Banana Bread

The simplest thing to make in the entire universe. I’m not even kidding; I have left entire ingredients out of this recipe before, and it still keeps coming up edible.

IMG_8848

  • 3 tbsp olive oil (or other vegetable oil)                                          – 2 cups self raising flour
  • 2/3 cup sugar                                                                                                          – 3 eggs
  • ¼ tsp bicarbonate of soda (baking soda)                                         – ½ tsp salt
  • 4 large or 5-6 small mashed bananas

Preheat oven to 180 C. Grease loaf tin and set aside.

In a mixing bowl, beat sugar, oil and eggs together until light and fluffy. Beat in bananas (if you’re using an electric mixer, you don’t even have to mash them, just dump them in one at a time and let the mixer squoosh them). Sift dry ingredients into the bowl and mix well. It should still be pretty liquid at this stage.

Pour mixture into tin and place in oven. Bake for about an hour; shorter if you like things heavy and moist, longer if you like them fluffy and light. Simple! Slice and eat hot, cold, toasted with honey or however you prefer.

IMG_8911

Butter cake with passionfruit icing

Up until Japan, I baked my cakes in regular, round cake tin. Nagahama, however, had never heard of such a thing, so I wound up instead having to buy two tiny loaf tins and bake two tiny cakes …. which has turned out to be the best thing ever. I now get one cake to eat and another to freeze for the next time I fancy cake and don’t feel like baking (and sometimes when a woman needs cake, she needs it right away!) Other advantages are that small cakes get eaten quickly, even if you don’t have any visitors for a few days and they also make portion control much easier. Kin could happily eat an entire meal of cake, so he likes the small ones; for some reason, it’s much easier to cut yourself a small slice of a small cake than it is to cut a small slice from a large cake.

IMG_3015

Butter cake (Margaret Fulton):  

  • 125g butter (half a block)                                                                 – 2 cups self raising flour
  • ¾ cup caster sugar                                                                              – 2 eggs
  • 1 tsp vanilla                                                                                             – ¾ cup milk
  • Pinch salt

Preheat oven to 180 C. Grease your cake tin/s and set aside.

Cream butter with vanilla and sugar until it looks white and fluffy. Beat in eggs, one at a time until thoroughly combined. Sift flour and salt together three times and fold into mixture alternately with milk, using a spatula or wooden spoon.

(I regularly skip this careful sifting and the cake still turns out pretty good, so if you’re in a hurry, just stir it up and go)

Dollop mixture into tin/s and place in oven. Bake for 30 minutes (twenty-five, if using two pans).

Icing:                    

  • 1 cup icing sugar                                                                                          – 1 tbsp melted butter
  • 2-3 tbsp passionfruit pulp

Makes enough for one of the little loaf-cakes, so if you’ve made a big cake, double up.

Using a spatula or a bread and butter knife, mix the lot together in a bowl, then spread it on top of the cooled cake. Too simple! I also often replace the passionfruit with whatever citrus is handy; use a few tbsp of the juice and grate up a few teaspoonsful of zest to mix through as well.
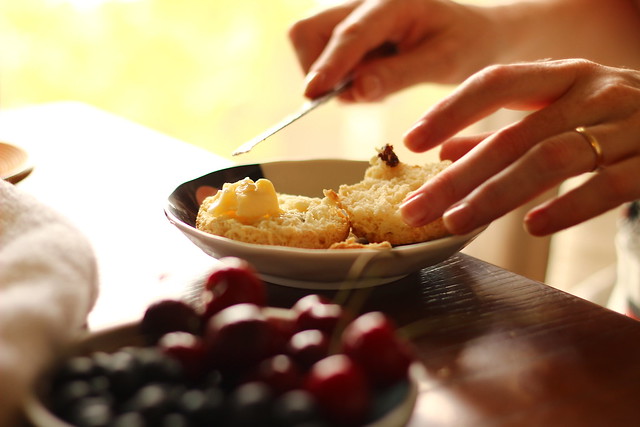
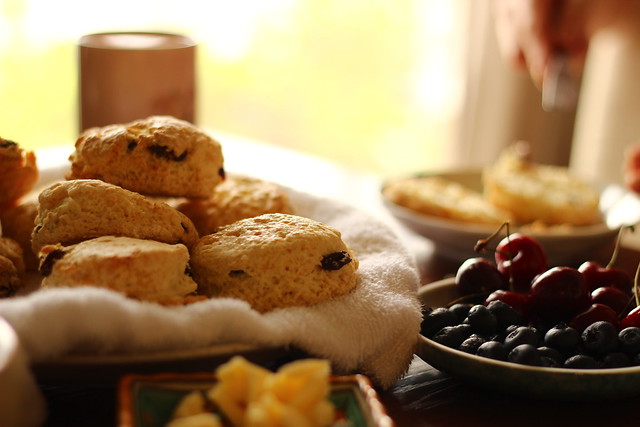
Sultana scones

Slightly more tricky here: If you want these guys at their best, you actually have to cook them at teatime. Scones are a teatime staple for a reason, though; they’re cheap, quick, pretty easy and bloody awesome. I like plain scones with jam and cream, but Nagahama sometimes had trouble providing these, so sultana ones with butter were a good mainstay.

IMG_1568

  • 60g chilled, chopped butter                                                                 – 2 cups self-raising flour
  • ½ cup sultanas                                                                                        – ½ cup milk
  • 1/3 cup sugar

Preheat oven to 200 C. Grease a baking tray or dust it with plain flour and set aside.

Sift flour into a bowl and then rub in the butter with your fingers until it looks like fine breadcrumbs. Give the bowl a thump on your benchtop every now and then, to bring the big lumps to the surface. Stir in the sultanas. Make a well in the centre of your mixture and very slowly pour in the milk, stirring quickly with a butter knife until you have a dough. You may not need all of it, so watch out; if your mixture gets too sticky, you’ll have to dust it with a bit more flour.

This next step is where all recipe book authors turn out to be filthy liars. They will now tell you to turn the dough out onto a lightly floured surface and knead it until smooth. Do NOT do this, unless you enjoy eating grey, tasteless lumps. Instead, gather the dough gently into a ball, turn it out onto the lightly floured surface and then carefully fold and press it a couple of times until it looks like it’s fairly well combined. You may only need to do this two or three times and remember to be gentle!

IMG_1510

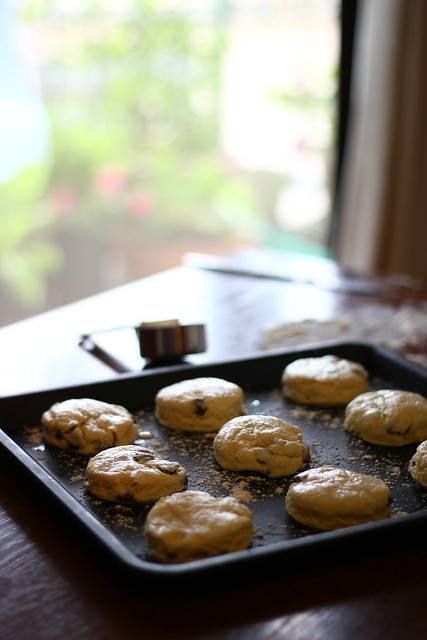
Roll the dough out until it’s about two cm thick. Use a biscuit cutter or the top of a small water glass to cut scones from the dough (probably 16-17 of them). Place on the tray about 1cm apart and brush them with a little milk. Bake them for about ten minutes or until they sound hollow when you tap them on the bottom. Serve hot, with butter!

Even at 1/3 cup, these scones aren’t super sweet; I’ll add more or less sugar depending on how we feel. If they turn out to not be sweet enough for you, these scones are lovely with some honey or stewed blueberries.

IMG_3531

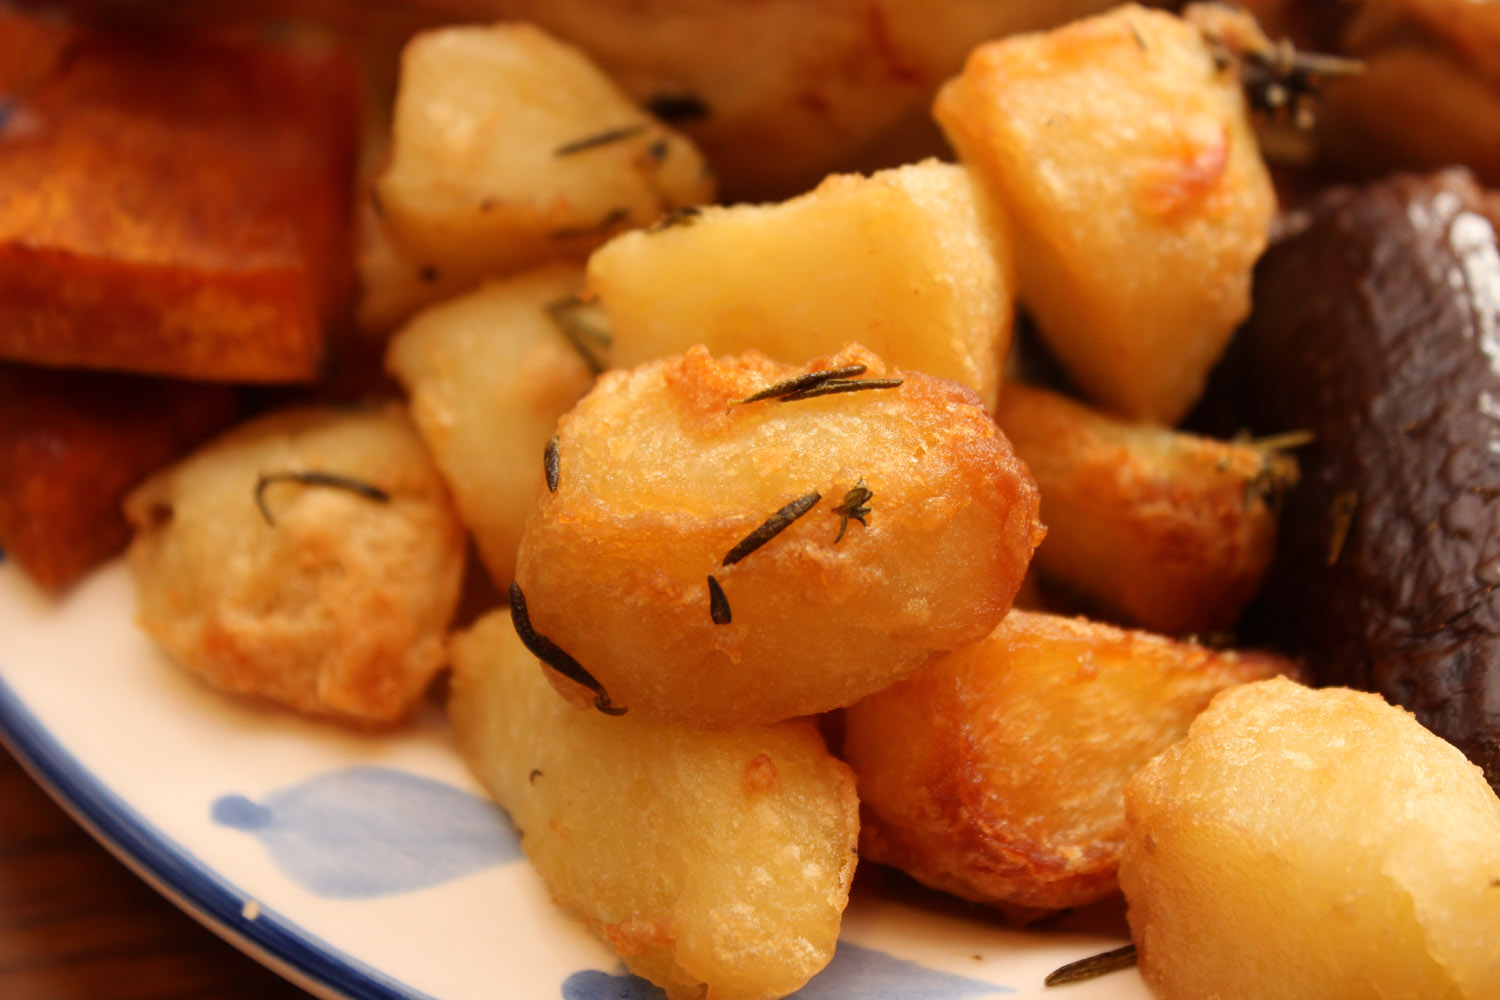
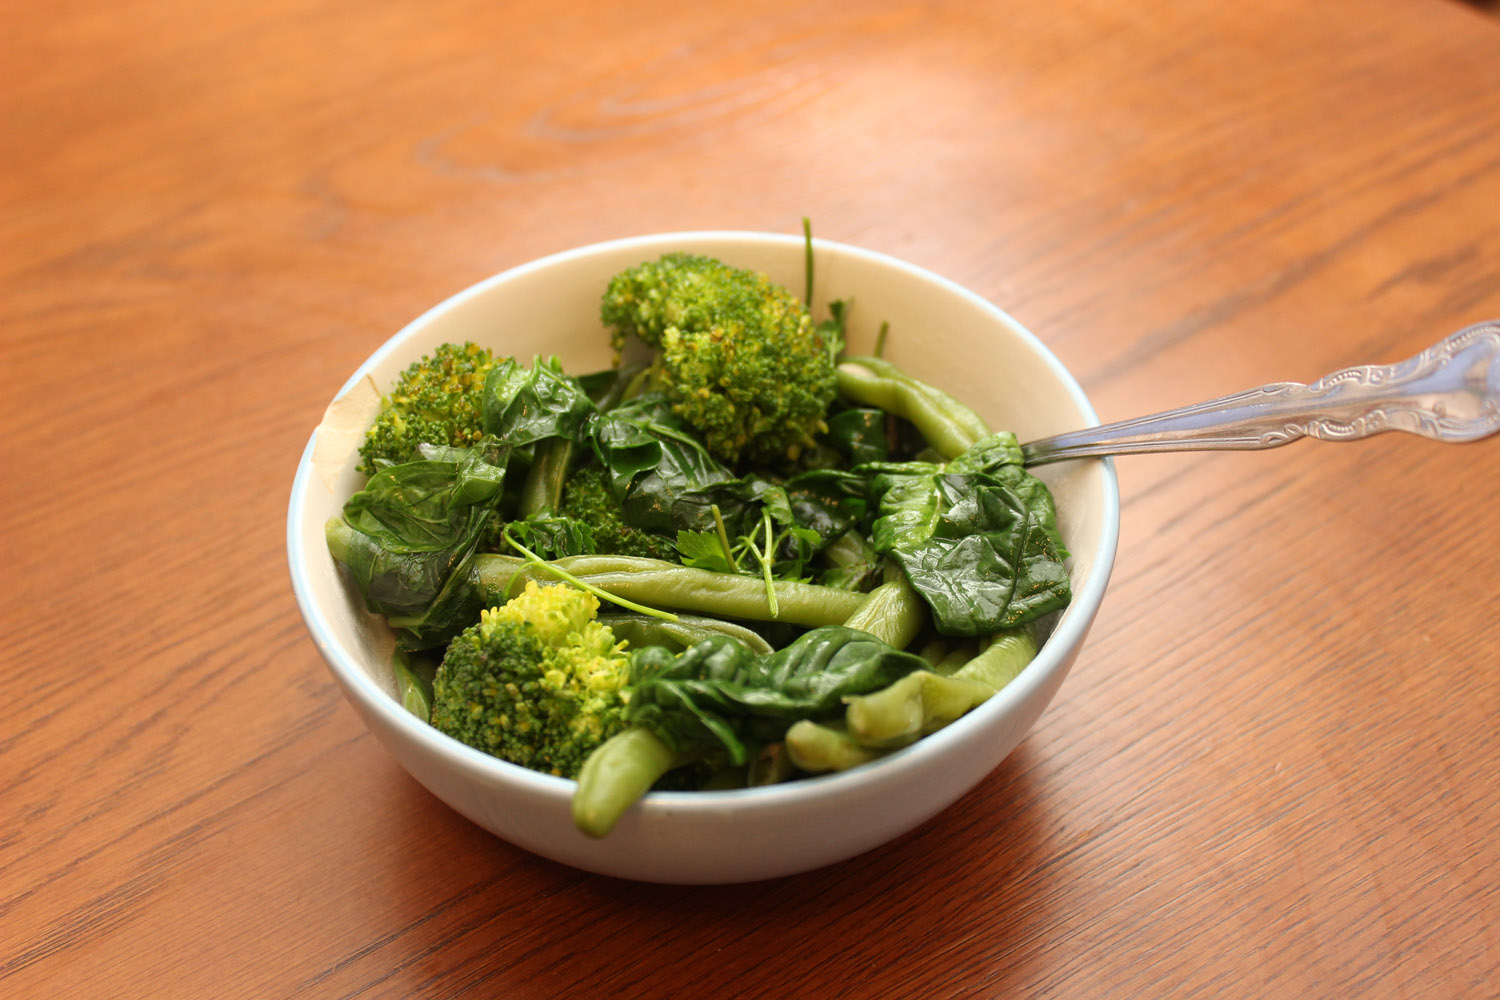
Morning and afternoon tea are small, light meals, with the main focus being your chosen drink, rather than food. On working days, our afternoon tea is as simple as coffee for Kin and a pot of tea for me, with some little treat like a slice of cake or some good fruit or mochi. On non-working days we become a little more elaborate and along with our sweets, we also enjoy things like olives, devilled eggs, little sandwiches and other small, savoury items. The point isn’t the food, it’s the event; a period of stillness, pleasant sensations and happiness in solitude or in good company. Stuffing yourself with half a cake is no luxury at all; but slice of it with afternoon tea is an experience to savour.

IMG_3780

Tea’s up!

Gem

XX

On the Boil: The Awesomeness of Soup


By Gem
IMG_8615

Now Australia is beginning to settle into autumn, and the spring days here in Japan maintain their chill… Now, it is time to sing the song of soup.

O Soup, the nourishing
Soup, the tasty
O, Soup, ye friend of the poor and saviour of the lazy…

… not to mention, Soup, the best way I know of getting rid of whatever’s going leggy in the garden, or leaky in the fridge. Or, Soup, how you can get five serves of vegetables into one meal, let alone one day. Or even Soup, a really good way of impressing lunch guests without really doing anything. 

But none of those really rhyme so well, do they?

Soup and Scheduling

I’ve spoken before about the importance of planning when you’re trying to keep your diet properly balanced. If you’re generally lazy (I am!), busy (I am!), or just someone who can’t always be trusted to make decisions like a grownup (I am!), but you still want to keep everyone properly fed during the week, then you need to organise your kitchen ahead of time.

Soup is central to my day-to-day organisation. If you always keep a jug of soup and a bottle of salad dressing in the fridge, you will always have a lovely, vege-ful meal half organised before you even get home from work.

This is great for those days when you just plain don’t feel like cooking or discover you have unexpected guests on a night you were planning to make scrambled eggs on toast. With about three minutes extra work, your scrambled eggs become an omelette, and you have soup, salad and toast ready to go with it! Salads and soups travel quite happily to work with you and will turn your lunchtime sandwich into a real meal. It also helps you feel better about those days when you haven’t prepared, but you’re already exhausted and just buy a barbequed chicken and some bread rolls on your way home from work. You’re still giving everyone a decent, balanced meal, you’re just not killing yourself to do it at a time when you just don’t have the energy.

Soup is also another arrow in my quiver against the Healthy-Food-Costs-More brigade.

IMG_8438

Getting Organised

Soup and salad dressing are both very simple to make. I shake up my salad dressing in an old squeezy-top mustard bottle that Kin washes out each time we empty it (about every month or so) and store it in the fridge. Just find an old jar, dump in a couple of tablespoons of a nice vinegar (we like a very acidic red wine vinegar), about double that of oil, salt, pepper and any additives that take your fancy (I often add about a tablespoon of Dijon mustard, crushed garlic or some parmesan shavings), shake it up and boom; vinaigrette dressing ready whenever you want it. Just give it another shake when it’s time to squoodge some out.

(Here are some rather more precise recipes if you’re nervous about that sort of thing. Or you can simply buy a nice, low kilojoule salad dressing to keep on hand).

IMG_8385

On the whole, though, it’s even easier to construct a soup than it is to make a salad dressing, and it’s a lot more impressive to visitors.

Basic Soup No 1: Green Velvet

IMG_2939

This soup is Kin’s favourite; it’s also the easiest soup I know! A basic soup like this just needs vegetables and stock. I usually use a liquid chicken stock for my soups, but there are no real rules when it comes to soup. If you are vegetarian, use vegetable stock. If you can’t make liquid stock (I’m not very good at it, either) or afford to buy it, use cubes from the supermarket. Don’t fret too much about getting things right; it’s soup. Soup will forgive you for just about anything.

Ingredients:

1 head of broccoli, divided into small florets, stem chopped
1 bunch of spinach, washed
1 large onion, finely chopped
2 cloves garlic, crushed or finely chopped
2 largeish potatoes, peeled and chopped into cubes
1.2 litres of stock (or whatever. If you like a thicker soup, use less. If thinner, use more)
Splash of olive oil
Herbs or seasonings (see variation). Today’s herbs for us are oregano, thyme and rosemary.

IMG_8376

Method:

Heat the oil in a saucepan and brown the onion and garlic over a low-medium heat until softened (probably more than five minutes, probably less than ten. Again, it’s soup; don’t worry so much). Add the potato and stir fry for 2-3 minutes (if adding dried herbs, this is a good time. This is also when I add hard herbs like rosemary), then pour in the stock. Bring to the boil, and then simmer for about fifteen minutes, or until the potato is tender. Add the broccoli (and any other fresh herbs), simmer for about four minutes or until broccoli is tender, then add spinach. Stir through and turn off heat.

Liquify soup using a stick blender, food processor, or whatever you have on hand. If you don’t have any of those things, go to an op shop or a pawn shop and buy one. I don’t care how broke you are. Being able to make soup is going to save you more money than a second-hand stick blender could possibly cost you.

Pour soup into bowls and serve, or into containers to store in the fridge. I sometimes pop a swirl of cream in each bowl, but it isn’t necessary. This soup reheats quite happily in the microwave and keeps for over a week in the fridge.

Variation: Leave out the herbs and instead add half a teaspoon of cumin at the end of cooking. Serve each bowl with a blob of natural yoghurtIMG_8409

This soup can also be made with any sort of vegies you have lying around, like carrot, beans, zucchini and any sort of leafy greens. Just simmer hard veg for longer and add leafy veg toward the end of cooking time. If you like a thick soup, add more potato. If you like a thin soup, add more stock. However you make it, it will always be delicious. It will also be cheap and give you a hefty serve of vitamins and fibre with every verdant bowlful.

What other sort of soup recipes would you like to see? Or does anyone have a good recipe of their own? I’ll be back in my garden soon and I’ll be on the lookout for nice ones.

Happy souping!

Gem

XX

Sumo Food: Chanko Nabe

I know! I’m late! I promised Beans this recipe ages ago, though, so I really wanted to wait for nabe night!

IMG_2918 IMG_2831 IMG_2896

IMG_2859

Vegetarian readers are also safe to stay this time! I’ll offer a few options for de-meating the dish as we go. 

Those of you who are familiar with Kyuushockers will already know that our school lunches tend to be a bit light on the vegie side of things. Nabe is one of my favourite ways of making up for this; it’s an easy way to get HEAPS of vegies into yourself, without having to work very hard. Kin also approves of nabe because it doesn’t make a lot of dishes; all of the ingredients are popped into the communal stockpot, and you haul out whatever you fancy to eat, replacing ingredients as the pot empties.

Nabe ingredients differ with the season (which is a nice way of saying “with what’s on special at the supermarket/going leggy in the garden”). If you don’t have all of the ingredients in this recipe, leave them out or replace them with something else. Greens are greens, roots are roots; I would only recommend that if you’re having trouble sourcing/affording asian mushrooms, buy them dried or leave them out.

 Dashi (Stock)

This is my weeknight dashi; I get a little more elaborate on the weekend. Take a piece of kombu, (dried kelp) around 20 cm by 10 cm and wipe off any white residue with a damp cloth. Soak the kombu in a litre of water for at least half an hour. Hell, leave it in there and go to work; it’ll be fine when you get home. Gently heat the water (skimming occasionally if you can be bothered; I can’t) until it is almost boiling, then whip out your kombu and discard it. IMG_0252

Next comes katsuo. Since it’s a weeknight, I’m using dashi granules, which are available at any asian grocery and, these days, probably at supermarkets as well. They tend to come in a blue packet and will have instructions on the side (even if the instructions are in Japanese, just look at the numbers; you’ll work it out). Mine comes in sachets to be used with 600ml of water; I’m using two and a half and adding 500ml to my kombu stock, so now I have 1500ml all up. Since I’m using dashi granules, the stock will be a little scummy on top; if that bothers you, give it a skim before you go any further.

If you are vegetarian, dried shiitakes make a gorgeous alternative to fish-based dashi; just pour boiling water over about eight of them in a saucepan and leave them to soak. You get mushrooms AND dashi! Kin and I aren’t vegetarian, but shiitake dashi is one of our favourites.

Now that your stock is prepped, you just need to pop it into your nabe pot (a big saucepan will do) and stick it on the hotplate.  I then add a shake (probably about 50ml) of soy sauce and about the same of mirin. Tonight, we’re also having a dash of ponzu in there as well, just because we like it. Once it’s boiling, you’re ready to start adding ingredients!

IMG_2894

Ingredients

Vary as desired; the dashi is the important bit.

  • Chicken and/or fish (or extra mushrooms and cottony tofu for the vegos!)
  • Tofu
  • Udon noodles (fresh or dried). We’re also having konnyaku noodles!
  • Flavourings (chopped green onion, grated ginger and garlic chives)
  • Sliced root vegetables (One medium carrot and about 15cm of lotus root)
  • Leafy greens (Pak choy, bok choy, chrysanthemum greens and about a quarter of a wombok)
  • Mushrooms (shiitake and enokitake)

The quantities are up to you. The first time you make it, try a bunch of each thing and see if you need more or less. The best order to pop things into your stock is:

Meat…IMG_2829

Then flavourings…
IMG_2910

Then root vegies… IMG_2912

Then go mad and throw in whatever you’d like!
IMG_9578

On nabe nights, cooking and eating happen simultaneously, so you’ll only need a very small bowl each, with a soup spoon and chopsticks. You’ll also need at least one slotted spoon and a ladle for scooping out your dinner! When the ingredients you fancy are ready, ladle them into your bowl, devour them, then ladle out some more. Keep topping up the pot until everyone is full. (Needless to say, meat is the ONE ingredient that absolutely cannot be added later, unless you’re going to let the soup boil by itself for a little while). If you don’t have a portable hotplate, you can also prepare your nabe on the stove.

Traditionally, rice or noodles were added at the very end of the meal and then enjoyed in the soup, but Kin and I enjoy our noodles with the rest of the ingredients, so we stick them in a few at a time and haul them back out as we fancy them.

Chanko nabe is warming, hearty winter comfort food that still manages to be extremely high in fibre and nutrients. I love it after workouts and Kin loves it any time at all, especially since he gets the leftovers for breakfast. Nabe is also cheap (because you toss in whatever you can get) and super-fun to serve to guests!

What are your go-to dishes in winter?

Gem

XX

Cheep Cheep: Budget Roast Chicken

This week’s recipe: Roast chicken and stuffing, roast vegetables (with super-crunchy potatoes) and steamed greens with basil and parsley.

IMG_2589fix

IMG_2591
IMG_2594

Hopefully any vegetarian readers have already fled; if not, please be warned: Today’s post is not for you! If that first shot wasn’t enough to put you off, the ones below definitely will! Why don’t you try this blog or this one today instead?

Kin is very eager to practice his food photography and a couple of other people have suggested we include a regular recipe section. I’m not sure how well I’ll manage it; I’m not a trained chef or dietician and I don’t really intend to become a food blogger. That being said, I can boast of one skill that I’m not convinced all food bloggers possess: I am capable of producing decent mails on a daily basis. You probably won’t see perfectly swirled berry tarts or bowls of glossy pasta with one salmon egg and a single piece of cress balanced on top, but you will know that the dishes you see here can be cheaply reproduced and are usually manageable on a weeknight timetable. Also, unlike most food photographers, Kin actually has to EAT the dish once he’s finished photographing it, so he has a vested interest in maintaining flavour, rather than appearance.  

IMG_2540

Roast chicken is one of my favourite weapons in my personal war against the “real food is expensive” brigade. One small chook with stuffing will give two people a massive dinner, a couple of decently hefty lunches (think sandwiches or chicken salads), wings for snacking and a carcass to make into soup. I defy you to get that out of KFC. Roasting a chicken is also super easy! The only slightly tricky bit is the stuffing, but if you make it the day before, there’s no hassle involved.

Today’s stuffing is a fairly basic one; the main flavours come from onion, bacon and this little champion here:

IMG_2410

That’s sage, one of the nicest herbs I know for flavouring meat. With care, it will grow into an attractive silvery-leafed shrub. With abuse, it will grow into stunted, silvery-leafed sticks, but will still survive to flavour your food, no matter how badly you treat it. I like that in a plant. Dried sage is also easy to find in shops and the flavour is decent.

Breadcrumbs provide the bulk of your stuffing; you’ll need about four slices with the crusts cut off (we use wholemeal, but it isn’t important). If you have a food processor, toss your bread in and blitz it to crumbs. If not, cut it bread into the smallest cubes you can. Place it in a bowl, and season with pepper and salt. Add any herbs you fancy finely chopped or processed; tonight our pots have provided parsley, thyme and a little rosemary, but if you don’t have fresh herbs, don’t go out and buy them. A shake from a jar of dried herbs will do nicely.

IMG_2506fix

Heat a tablespoon of oil in a frying pan (med-high) and drop in about three leaves of sage. Let them frizzle and crisp for a moment, then reduce the heat to medium and toss in one finely chopped brown onion and two – three rashers of bacon, also trimmed and finely chopped. Cook, stirring for three minutes, or until onion is soft and translucent. Dump this into your breadcrumbs and mix it around with a wooden spoon. See if, when you squeeze the mixture in your fist, it keeps its shape. If not, try adding an egg, a little milk or some melted butter to bind it together. Once the mess is moist enough to hold a shape without being sticky, it’s ready to go.

Get your oven preheating to about 190°celsius (a little up or down won’t matter). Give your (thawed) chook a good wash with cold water, including inside the cavity. Dry it off with paper towels or tea towels if you plan to wash them right away. Then, trim off any fat you don’t fancy, shove in your stuffing and secure the cavity with toothpicks. Lightly oil and salt the outside (if you want to) and put it in the oven, breast side down for thirty minutes.

IMG_2569fix

I also include a head of garlic during this first part of the cooking time (garlic needs very little time to roast) for use in soups and sauces through the week. Just stick it in the fridge and it will keep almost forever.

For a weeknight dinner, I don’t do anything very elaborate with the veg; I usually toss them in a small amount of olive oil and season them with garlic powder and chopped rosemary. Ditto the greens; today’s are a combination of broccoli and beans, steamed for two minutes. After two minutes, I add spinach, flat leafed parsley, basil and a tiny wodge of butter and steam the lot for one more minute.

Potatoes, however are a serious matter. For super crunchy spuds without a lot of oil, peel, chop and then par boil them (starting from cold) for ten minutes until the outside is soft. Drain your potatoes, then toss them in their sieve to break up their outsides. Then tumble them in your oil and seasonings. 

IMG_2587

Put your potatoes and other baking veg on a tray together (tonight we’re having pumpkin, onion, carrot and finger eggplant). Once your chicken has been in the oven for thirty minutes, turn it breast side up and put it on the lower oven shelf, with your tray of vegies on the top shelf. Also take this time to pour off and store and juices collected on the tray; you’ll want them for gravy or soups.

After half an hour, add your soft vegies (this is when I actually add the eggplant), like tomatoes, zucchini or capsicum. Wait another half hour and your dinner is done!

IMG_2610
IMG_2608fix
IMG_2592
IMG_2601
IMG_2618

Once you’ve done your prep, this meal will cook quite happily without your supervision. You can have a bath, do some cleaning, entertain guests, whatever you’d like. If you’re the forgetful type, though, make sure you set a timer. You can also be really lazy if you want and just throw in all of your vegies at the one hour mark soft ones included; just don’t blame me if you end up with salsa!

Gem

XX

P.S. I tried to keep the word count down, so I might have left something out. If you have any questions, just send me a message and I’ll clear it up.

Coffee Body Scrub

fixed-coffee-stuff

WE-ARE-SO-TIRED!

Kin can’t sleep at night because of the heat so, of course, I can’t sleep either. In the morning, when it is a little cooler, I can’t sleep because of the bright sun so, of course, nor can Kin! We’re a very sad and weary pair right now and have been for about a month.

On the other hand, our next-door neighbours have a new baby that, no matter which one of us is awake, at whatever time, we always seem to hear crying. That’s put our problems into some perspective; at least we’re getting some sleep! That couple must be so exhausted, I’m sure they’re close to crying as much as the baby.

So, after a bad night’s sleep and a hard day’s work, what better way is there to rejuvenate myself than with a lovely, home-made coffee (thank you, Kin!) and a lovely homemade coffee body scrub?

Recycling Coffee Grounds

Usually, Kin’s used coffee grounds end up in the same place as my used tea leaves; fertilising our leafy greens! Recently, though, I’ve started swiping them for a different purpose. I don’t know if it’s a Japan thing or just my local area, but I have searched far and wide for a body scrub with no success at all. I DID find one tiny little tube of salt scrub which, not to mention how expensive it was, would be an absolute nightmare for my dry, cranky skin. So I’ve started making my own!

To start with I just scoured myself with the plain grounds, but after a bit of thinking, a bit of Googling and a bit of experimentation, I’ve come up with a recipe that makes me fairly happy.

Coffee Body Scrub

I’ll do this in ratios, because not everyone uses Australian measures:

– 1 part coffee grounds

– 1 part brown sugar (what they call “brown” here is more like the stuff we call “raw” in Oz)

– 1/3 part olive oil

– Cocoa powder and vanilla essence.

I just mix all of these things together in a bowl, pop it into a little bathroom pot with a lid and voila! A gorgeous, extremely cheap scrub that works really, really well.

IMG_5634This scrub is honestly a bit too rough for the face (although I have no choice, so I’m using it anyway, just very gingerly). But for the bod, it’s perfect and it smells absolutely divine. I chuck the cocoa and vanilla in there just to add to the scent (it stays on the skin so nicely). I know that cocoa flavenoids are supposed to be beneficial for skin health, but I’m pretty sure you need to ingest the stuff, not just slap it on yourself and hope. Ditto topical caffeine from the coffee; I’m pretty sure it needs to stay on the skin, not just get rubbed on and rinsed off.

This scrub would probably be really luxurious if you had sweet almond oil, or glycerine or all sorts of other things that I wouldn’t be able to get here. But even with plain old olive oil, I’m happy.

For those manly folk who are scoffing at my recipe, I have one word for you: Solvol. But home-made, recycled-ingredient Solvol. Interested now? Every bearded eco-warrior needs something to get the bicycle grease or planting dirt off their hands. It’s also good for beard dandruff or product buildup in your hair (although warning to blondes; we also discovered it will stain pale things, including hair!).

IMG_5636I love finding new ways of using things and this scrub has been a real winner. And even if I’m taking some of the lettuce’s coffee grounds away from them, as long as this weather keeps up, Kin will keep producing plenty more! Are there any other uses for coffee grounds or tea leaves that I’m missing?

Gem

XX

© 2024 En Route to Awesome

Theme by Anders NorenUp ↑